ROI max pooling and shareable layers : fast and accurate deep learning nets.
As seen in previous post, deep nets read the correct letter with a correctness of 99%.
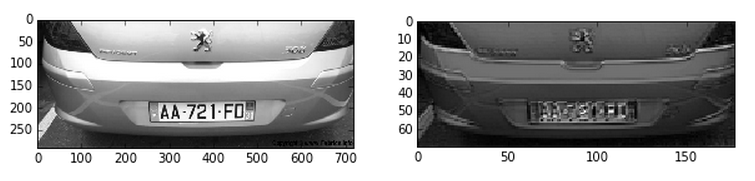
Now let’s go further to get precise position information about the license plate and its letters, as explained in Faster RCNN publication from Microsoft Research two weeks ago.
I will re-use the first 2 convolution layers to create a feature map over which I will slide a window of 3x3 on top of which will operate two new nets :
-
a box classification layer, giving the probability of the licence plate to be centered on this point
-
a box regression layer, giving the size of the box on that point
These two new nets are composed of a common innerproduct layer “ip1-rpn”, and another innerproduct layer specific to each of them.
Instead of training these nets on the feature map, I will train the full net composed of the first 2 convolution layers and the two new nets, but with a learning rate set to 0 for the first 2 layers. At the end, the effective receptive field on the input image will be of size XxX.
During testing and deployment, the sliding ‘inner product net’ on a window of 3x3 will be replaced with a simple ‘convolution net’ of kernel 3 with the same parameters.
A a dataset, I labeled the letters on each images and I can easily extract the plate zone. Statistics of license plates are :
| Average | Max | Min | |
|---|---|---|---|
| Width | 200 | 673 | 18 |
| Height | 40 | 127 | 15 |
| Min orientation | - | 20 | -26 |
So I will consider the output of the nets to predict the probability and regression of 5 anchors at 5 different scales / widths : 660x330 - 560x187 - 460x153 - 360x120 - 260x87 - 160x53 - 60x20.
Train net
Here are the different steps for the train net :
-
re-use the previous net parameters for the shared layer that will have the same names : conv1, pool1, conv2, pool2.
-
fix their learning rate at 0 :
param { lr_mult: 0 decay_mult: 0 } -
keep the dropout layer after the convolution layers
-
change the name of the innerproduct layer “ip1” for “ip1-rpn” to train with new random weight params and replace the innerproduct layer “ip2” with 2 sibling convolutional layers :
-
“cls_score” with 5 x 2 parameters (the probability or not to be a plate)
-
“bbox_pred” with 5 x 4 parameters : t_x, t_y, t_w (width) and t_o (orientation)
-
-
add a “SoftmaxWithLoss” layer for cls_score and “SmoothL1Loss” layer for bounding box regression layer.
-
data layer
Training set
I will feed the data layer with extracted rectangles, and for each rectangle, the label and the rectangle coordinates x, y, w and o. Since order is preserved, I can simply add 4 new repeated fields to the caffe::Datum message format :
message Datum {
  optional int32 channels = 1;
  optional int32 height = 2;
  optional int32 width = 3;
  // the actual image data, in bytes
  optional bytes data = 4;
  optional int32 label = 5;
  // Optionally, the datum could also hold float data.
  repeated float float_data = 6;
  // If true data contains an encoded image that need to be decoded
  optional bool encoded = 7 [default = false];
  // ROI
  repeated int32 roi_x = 8;
  repeated int32 roi_y = 9 ;
  repeated int32 roi_w = 10;
  repeated int32 roi_h = 11;
  repeated int32 roi_label = 12;
}
Since optional is compatible with repeated in the protobuf format, I could also have changed the label field as repeated but this would require more changes in the code.
With this configuration, I can use caffe::Datum either in the ‘old way’, without the previous fields / ROI information, or in a 1-ROI way, where I add one rectangle information to each image, or in the multiple-ROI-per-image way, where I add multiple rectangles to each image.
The input layer will produce the correspondent new fields labels, bbox_targets and bbox_loss_weights (initialiazed to one) for the SmoothL1Loss layer :
layer {
  name: "MyData"
  type: "ROIData"
  top: "data"
  top: "label"
  top: "labels"
  top: "bbox_targets"
  top: "bbox_loss_weights"
  include {
    phase: TRAIN
  }
  transform_param {
    scale: 0.00390625
  }
  data_param {
    source: "train_lmdb"
    batch_size: 64
    backend: LMDB
  }
}
During the first training, I do not use a ROI Max pooling layer in the training net. I prefer not to send too big images but send the extracted rectangles rather than the full image.
#Feature map net
Let’s train with the previously learned parameters the new model :
~/technologies/caffe/build/tools/caffe train --solver=lenet_train_test_position.prototxt -weights=lenet_iter_2000.caffemodel -gpu 0
Once trained, I convert the innerproduct layers into the convolution layers to get a feature map, as seen in previous post.
Test/deploy net
On top of the feature map layer, add a NMS layer and a Top-N layer and a ROI pooling layer at the place of the dropout layer :
layer {
  name: "roi_pool3"
  type: "ROIPooling"
  bottom: "pool2"
  bottom: "rois"
  top: "pool3"
  roi_pooling_param {
    pooled_w: 7
    pooled_h: 7
    spatial_scale: 0.0625 # 1/16
  }
}
Creating our own NMS and Top-N layer.