The future paradise of programming thanks to AWS Lambda functions : let's send a newsletter for a Jekyll github pages site with a Lambda
Introduction
AWS Lambda is the future of programming :
-
no more administration of servers by the developers, a complete serenity : no more worry about how you’ll deploy the code into production
-
all computing power and required memory is now managed by the cloud provider
-
scalability : the cloud provider scales the power in function of the traffic
-
cost : low usage will lead to reduced costs in computing power
-
All this has a very important consequence, a new way of architecturing information systems, in an event-driven fashion rather than our traditional REST architectures. It is still possible to create a REST API above the event-oriented architecture, with an API endpoint that will translate HTTP and HTTPS requests (GET, POST, …) into events, thanks to AWS Gateway.
But the scope of possible sources of events, that will produce events for the lambda functions, is now much wider :
-
API Gateway (HTTP, HTTPS, …)
-
scheduled events
-
AWS services (S3, Cloudwatch logs, SNS…)
And events can be delivered/propagated on faster and safer protocol than HTTP.
This event-oriented architecture simplifies the development and the organization of information systems into what is now defined as micro-services : services with a narrow scope, that are independent, scalable, reliable and easy to communicate with for other parts of the organization :
-
services can be updated independently
-
services do not require the knowledge of other services’ context (see Domain Driven Design - by Eric Evans)
Microservices at Netflix :
Example : let us send a newsletter for a Jekyll Gihub Pages blog with an AWS Lambda function
This example works for any website with a RSS or ATOM feed or equivalent, listing the articles by dates, such as a blog, a news website, …
I’ll create a lambda function to fetch the latest articles from the RSS feed, and send them in a newsletter to our readers.
I’ll take the case of a free of cost Jekyll blog - hosted by Github.
Subscription can be integrated very easily into the website with MailChimp Sign-up Form builder or Mailjet Subscription widget : such forms collect emails into contact lists and have API to send newsletters to these contact lists later on.
Script development and local testing
Let us create a lambda function in Javascript using MailJet NodeJS Wrapper :
mkdir mylambda
cd mylambda
npm install node-mailjet
npm install xml2js
vi send_newsletter.js
and write the following javascript module, named send_newsletter.js, with the mission to get all articles being published the last week, and send their titles with their links in a newsletter :
var Mailjet = require('node-mailjet').connect('API KEY', 'API SECRET');
var blog_hostname = 'YOUR BLOG HOSTNAME';
var blog_path: '/feed.xml';
var newsletter_infos = {
"Locale":"en_US",
"Sender":"SENDERNAME",
"SenderEmail":"SENDER EMAIL",
"Subject":"NEWSLETTER SUBJECT",
"ContactsListID":"CONTACTLIST ID",
"Title":"NEWSLETTER TITLE",
} ;
var date1weekago = new Date();
date1weekago.setDate(date1weekago.getDate() - 7);
var http = require('http');
var parseString = require('xml2js').parseString;
exports.handler = function(event, context) {
var html_part = "";
var text_part = "";
var req = http.request({
hostname: blog_hostname,
path: blog_path,
port: 80,
method: 'GET',
headers: {"user-agent" : "NodeJS HTTP Client"}
}, function(res) {
var body = '';
console.log('Status:', res.statusCode);
console.log('Headers:', JSON.stringify(res.headers));
res.setEncoding('utf8');
res.on('data', function(chunk) {
body += chunk;
});
res.on('end', function() {
console.log('Successfully processed HTTPS response');
parseString(body, function (err, result) {
body = result.rss.channel[0].item;
var nb_articles = 0;
for(i in body)
if( new Date( body[i].pubDate[0]) > date1weekago )
{
nb_articles ++;
html_part += "<p><a href=" + body[i].link[0] + ">" + body[i].title[0] + "</a></p>";
text_part += body[i].title[0] + " : " + body[i].link[0] + "\n";
}
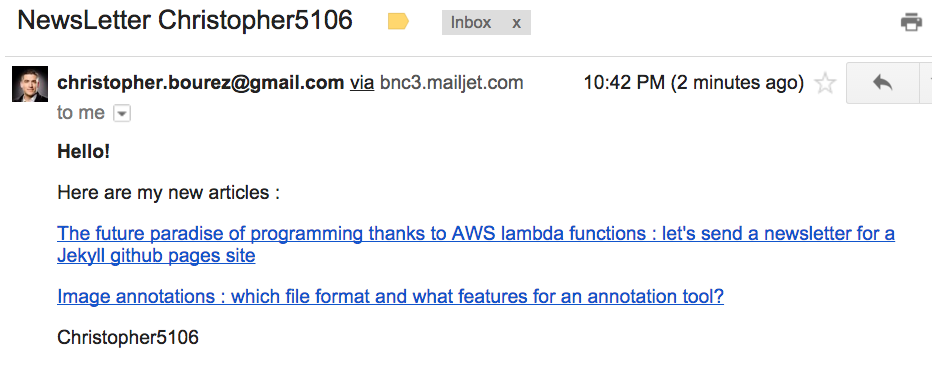
html_part = "<strong>Hello!</strong><p>Here are my new articles :</p>" + html_part + "<p>MY NAME</p>";
text_part = "Hello!\nHere are my new articles:\n" + text_part + "MY NAME";
if(nb_articles)
Mailjet.post('newsletter')
.request(newsletter_infos)
.on('success', function(res) {
var id = res.body.Data[0].ID;
Mailjet.post('newsletter/' + id + '/detailcontent')
.request({
"Html-part":html_part,
"Text-part":text_part
})
.on('success', function() {
Mailjet.post('newsletter/' + id + '/send')
.request({}).on('success', context.succeed).on('error', context.fail);
})
.on('error', context.fail);
})
.on('error', context.fail);
});
});
});
req.on('error', context.fail);
req.end();
};
In order to test our script locally on the computer, let’s write the following test.js script :
var send_newsletter = require('./send_newsletter.js');

var event = {};
var context = {};
context.fail = function (err) {
  console.log(err);
}
context.succeed = function( res) {
  console.log(res)
}

send_newsletter.handler(event,context)
and try it :
node test.js
If everything works fine, let’s upload it to AWS.
Upload to AWS and configure events for tests and production weekly execution
Since I used node modules, I need to package everything in a zip mylambda.zip :
zip -r mylambda *
that I can directly upload to the console :
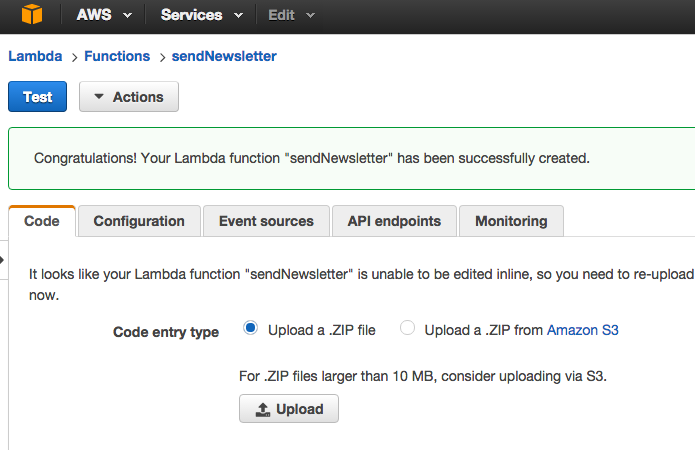
or with AWS CLI, provided you attached a Lambda:CreateFunction policy to your current AWS CLI user:
aws lambda update-function-code --function-name sendNewsletter \
      --zip-file fileb://mylambda.zip
Provided you have already created the lambda_basic_execution role for your lambdas, or know which IAM/EC2 role to use, you can also directly create it from command line :
aws lambda create-function --function-name test --runtime nodejs \
      --role arn:aws:iam::ACCOUNT_ID:role/lambda_basic_execution \
      --handler send_newsletter.handler --timeout 80 \
      --zip-file fileb://mylambda.zip
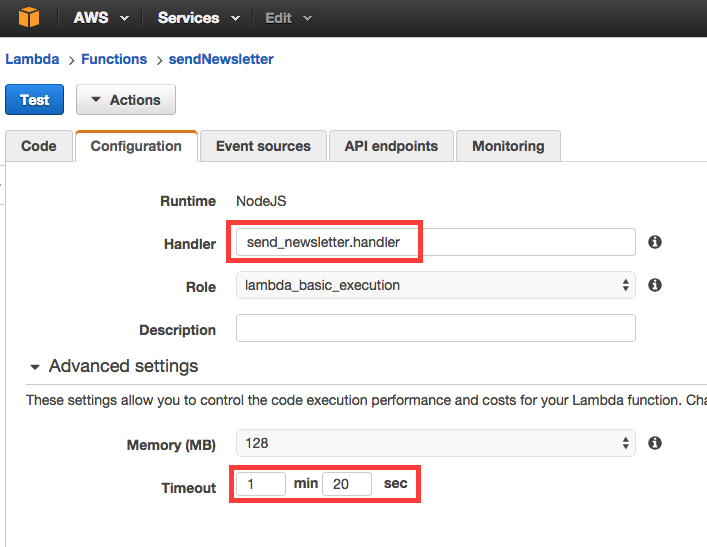
Configure the correct module name, memory, and execution time :
It’s now time to verify everything works well, by creating an test event :
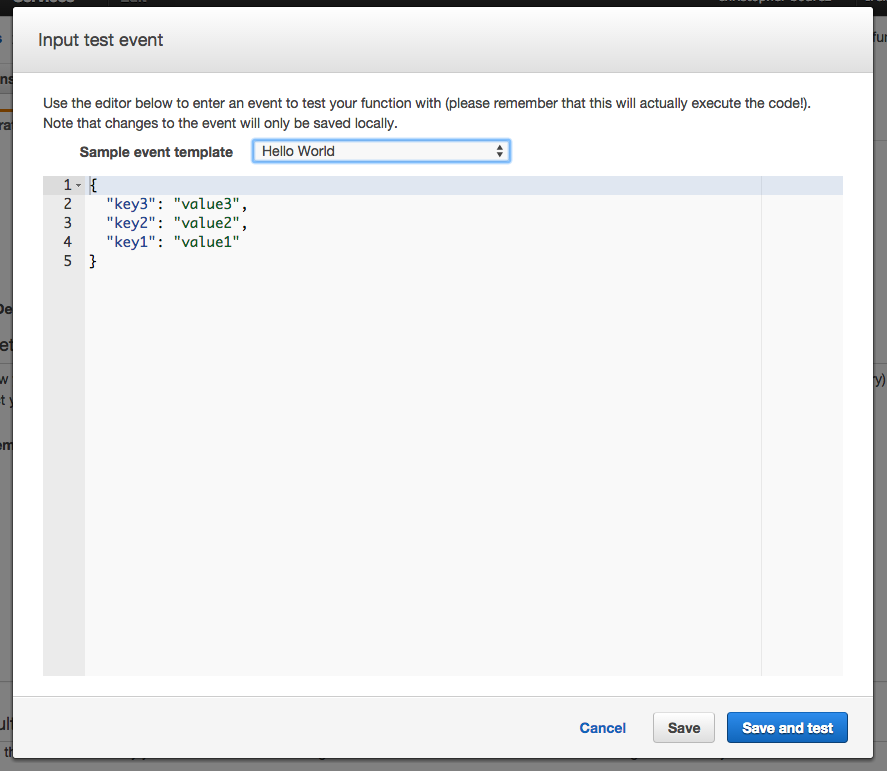
and execute it :
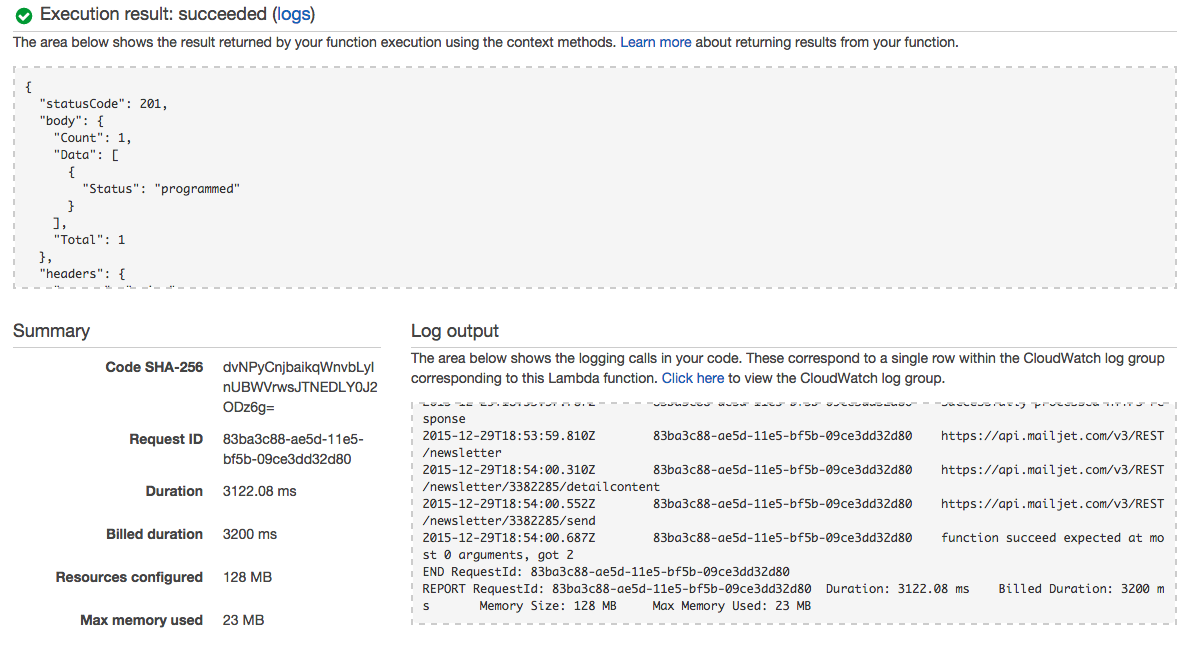
Have a look at the max used memory to check if you selected the right memory range. You can also check the duration and billed duration to ensure you are not charged for a too long timeout setting and an unterminated process.
You can also invoke your lambda with AWS CLI :
aws lambda invoke --function-name sendNewsletter results.json
Meanwhile, you’ll certainly received the result in your mail box :
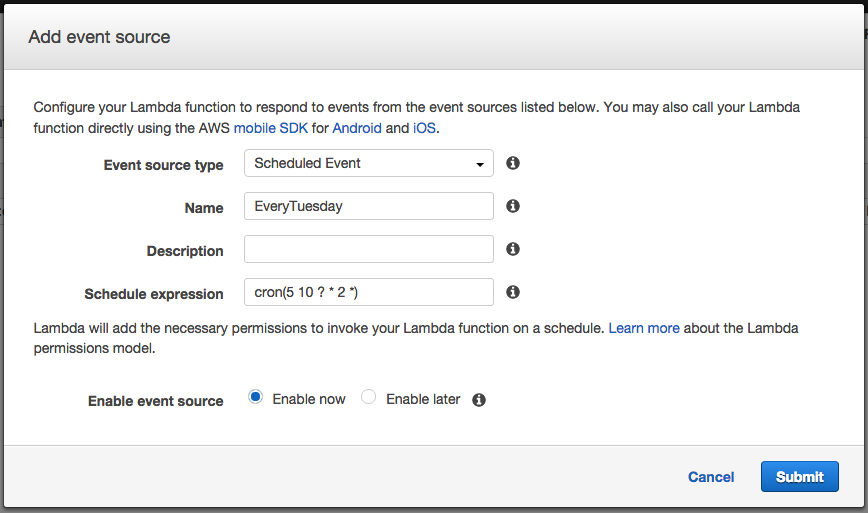
Now that everything works well, let’s add a scheduled event as event source to execute our lambda function every tuesday at 10AM UTC time :
Conclusion
We created a newsletter in less than an hour… You can now create thousands of such services, for whatever you feel like!
As soon as the libraries are compiled for the lambda execution environment and included into the ZIP file, and execution time is not more than 5 minutes (have a look at lambda limits), you can execute any code on AWS Lambda…
And for the AWS lambda costs ? computation of the 5 newsletters per month taking 3200 ms of AWS lambda 128Mo costs about 0,00003334 US$ per month. Free of charge.
Well done !